
Apple ID
Review: 9.7-inch $329 iPad (2018) – Should you buy it? By 9to5Mac
Accessibility, Apple, Apple ID, Apple Store, Blind, blind people, Chelsea Stark, iCloud, iOS, ios8, iPad Air, IPAD AIR 2, ipodHands-on with the 9.7-inch 2018 6th-generation iPad featuring Apple Pencil support. Review: https://wp.me/p1xtr9-2d7q Should you consider it? Pre-order at B&H + free shipping/no tax: https://goo.gl/H4zQuA
New iOS 11 Automatic Setup Process
Accessibility, Apple, Apple ID, Apple Store, Apps, BlindiOS 11 brings new setup features which allow one to transfer WiFi and Apple ID settings from other devices running iOS 11. Watch this video to see how easy it is to set up a new iOS device.

HomePod Unboxing! iJustine YouTube
Apple, Apple ID, Apps, Uncategorizedthe new Apple HomePod!
Watch my features and review video next: https://youtu.be/14lRHY7IZss
► SUBSCRIBE FOR MORE VIDEOS: http://www.youtube.com/subscription_c…
MUSIC I USE – https://goo.gl/Pe7GTL
How to use Applepay on the iphone 10
Apple, Apple ID, Apple Watch, Apps, Blind, ID, iOS, iPhone, UncategorizedUsing Apple Pay on the iPhone X is a little different than using it on the iPhone 8 and earlier. That’s because Apple Pay on older iPhones uses both the home button, and Touch ID, neither of which feature on the iPhone X. So how do you make an Apple Pay purchase with your new iPhone? It’s easy. Here’s how.
Apple Pay on iPhone X
Assuming you already have a credit card added to your Apple Wallet, you don’t need to do anything to set up Apple Pay on your new iPhone X. If you haven’t yet added cards, here’s how to do so, and how to set your default card.
Here’s how Apple Wallet looks on the new iPhone X.
pay, just take out your iPhone and double-tap the power button, also known as the sleep/wake button, aka. the button on the right side of the iPhone. This replaces the old way to invoke Apple Pay, which was a double-tap on the Home button.
Authenticate with Face ID
Then, you have to authenticate yourself. With Face ID, “authenticate” means “look at.” All you need to do is let the Face ID camera see you, and you’re done. A smiley-face icon will appear to let you know you were recognized. You can go ahead and wave or tap your iPhone X on the payment terminal as usual. If you want to switch to another non-default card to pay, then you can do so after authentication, but before you tap the phone to pay.
If you want to switch to another non-default card to pay, then you can do so after authentication, but before you tap the phone to pay. This method is almost identical to the new way to pay for apps in the App Store using an iPhone 8. If you’re accustomed to tapping your iPhone on the terminal first, and then authenticating using Touch ID, you’ll have to change your habits. Trying this with the iPhone X brings up a prompt telling you to double-tap the side button first. This stops anyone from skimming your card while you’re looking at the iPhone.
Back to the future
Face ID is starting to look like an amazing piece of technology. It essentially moves us back to the days where we used our devices without a lock, and never had to bother with passwords or fingerprint scanners. Now, your iPhone unlocks whenever you’re using it, and locks when you’re not. Seamless, and invisible, like good technology should be.

Set up Apple Watch using VoiceOver
Accessibility, Apple, Apple ID, Apple Watch, Blind, blind people, iOS 10, iPhone Set up Apple Watch using VoiceOver
- IfApple Watch isn’t on, turn it on by holding down the side button (below the Digital Crown).
- On Apple Watch, turn on VoiceOver by triple-clicking the Digital Crown.
- Swipe right or left on the display to choose a language, then double-tap to select it.
- Swipe right to highlight the Start Pairing button, then double-tap.
- On iPhone, turn on VoiceOver by going to Settings > General > Accessibility > VoiceOver.
- To open the Apple Watch app, go to the iPhone Home screen, swipe right to select the Apple Watch app, then double-tap.
- To get iPhone ready to pair, swipe right to select the Start Pairing button, then double-tap.
The “Hold Apple Watch up to the Camera” screen appears. - To try automatic pairing, point the iPhone camera at the watch from about 6 inches away.
When you hear the pairing confirmation, you can skip to step 14. If you have difficulty, you can try manual pairing, steps 9 through 13. - Swipe right to select the Pair Apple Watch Manually button, then double-tap.
- On Apple Watch, find your Apple Watch ID: swipe right to the Info About Pairing Apple Watch Manually button, then double-tap. Swipe right once to hear the unique identifier for your Apple Watch—it’ll be something like “Apple Watch 52345”.
- On iPhone, select your Apple Watch: swipe right until you hear the same Apple Watch identifier that you just heard on Apple Watch, then double-tap.
- To get your pairing code, on Apple Watch, swipe right until you hear the six-digit pairing code.
- Enter the pairing code from Apple Watch on iPhone using the keyboard.
When pairing succeeds, you hear “Your Apple Watch is paired.” If pairing fails, tap to respond to the alerts, then Apple Watch and the Apple Watch app on iPhone reset so you can try again. - When pairing is complete, on iPhone, swipe right to the Set Up Apple Watch button, then double-tap.
- To choose your wrist preference, swipe right on the Wrist Preference screen to select Left or Right, then double-tap.
- Review the terms and conditions, swipe right on the Terms and Conditions screen to select Agree, then double-tap. Select and double-tap Agree in the alert that appears.
- To enter the password for your Apple ID, swipe right to the Enter Password button, double-tap, then enter the password for the Apple ID you use on your iPhone. Then double-tap the Return key in the lower-right corner of the keyboard.
- To choose a Location Services option, swipe to your choice, then double-tap.
- To choose a Siri option, swipe to your choice, then double-tap.
- To create an Apple Watch passcode, swipe right on the Passcode screen to select Create a Passcode, then double-tap. On Apple Watch, enter a four-digit passcode of your choice, then reenter to confirm. Swipe, tap, or drag your finger around the display to select a number, then double-tap.
- On Apple Watch, choose whether to unlock Apple Watch when you unlock iPhone.
- To choose whether to install additional apps on Apple Watch, swipe to highlight Install All or Choose Later on iPhone, then double-tap.
Apple Watch syncs with iPhone. This takes a few moments—swipe to Sync Progress on iPhone to hear progress. When you hear “sync complete” Apple Watch is ready to use, displaying the watch face. Swipe left or right to explore watch face features. For information about using VoiceOver with Apple Watch, see VoiceOver.
How do I clean my AirPods?
airpads, Apple, Apple ID, blind people, iOS 10, IOS 8, iOS 9, iPad, IPAD AIR 2, iPad case, iPad mini, iPhon, iPhone 4s, iPhone 6, iPhone battery Protect your investment with regular cleanings and good aural hygiene. Dropping $160 on a pair of wireless earbuds in a dental-floss-sized case is no small decision. If you decided to spring for a pair of AirPods, you’re going to want to take good care of them so they’ll last you a couple rounds of iPhone upgrades. After all, these ones don’t come bundled in the box. Here’s how you clean your AirPods and keep ’em clean! With dirt, dust, lint, grime, ear wax, and more constantly finding its way onto your glossy white AirPods, you’re definitely gonna want to clean them from time to time. Consistency is your friend, friend: The best way to ward off long-lasting grime is by preventing it from building up. Clean and clean regularly.
Carry a microfiber cloth
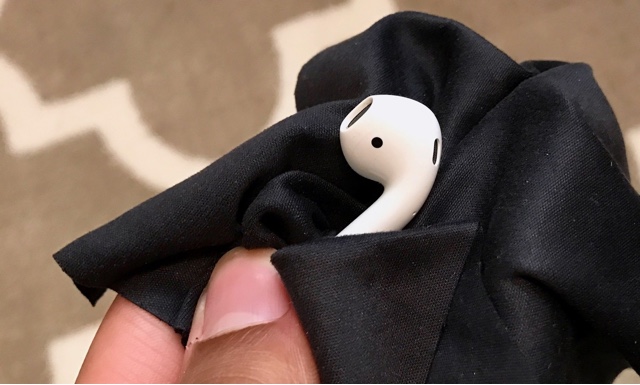
Get a little microfiber cloth and keep it on your person or store it wherever you charge your AirPods. Give your AirPods (and the case if you want) a quick buff every couple days.
If you happen to spot an offending smudge, go ahead and wipe it away.
You can pick up a six pack of microfiber cleaning cloths from Amazon and be set for life … or at least the life of your AirPods! Do not use hand sanitizer on your AirPods. You risk damaging the polish — or worse, the electronics. Instead, a little bit of water (purified is better than tap) on a cloth can help you wipe away the grease and grime.
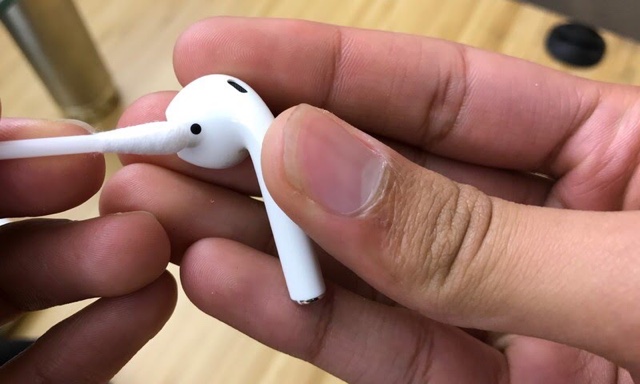
As much as I wish Apple’s AirPods were a seamless piece of plastic, they’re not. And the tiny, tiny little cracks and crevices start to fill up with dust, grime, etc. When a cloth-polish just won’t do, you’ve gotta get up close and personal.
I find a cotton swab is great for a thorough cleaning of your AirPods. Whether you’ve got ear wax clinging to the speaker grilles or dirt in the seams, a cotton swab will usually do the trick.
Lastly, if you’ve got a particularly stubborn smudge that won’t wipe away from the surface of your AirPods, you might try giving it a quick swipe or four with a rubber eraser. The rubber will pull the mark from the surface of your AirPods.
A word of warning, though: Don’t get lazy! Check on your little Pod Pals from time to time to make sure they’re not collecting grime.
Why it is important to protect your iPad from drops.
Accessibility, airpads, amp, Android, announce calls, Apple, Apple earbuds, Apple ID, Apple Store, case, cracked screen, iOS, iPad
As we grow more reliant on our gadgets, we take them more places beyond the living-room couch: the gym, on vacation, or onto a gritty work site. Even in the friendliest environments—say, the hands of a child—sometimes you need more than a flimsy cover to protect your investment. And at $499 and up, the most popular tablet of all, Apple’s iPad Air, practically demands it.
A case is one of the first accessories you should bye

 A good case will protect your investment from drops and Falls.. You may say that you are super careful. Or you only keep it in one spot.
 But there may be that one time you take it somewhere and it slips out of your hand.
The last thing you want to see is a broken screen.
Yes you can have your iPad repaired. But there is the cost of repair work also the time without your device. Specially if you’re using it for work. Investing in a case will save you money and time in the long run

There are many different kinds of cases out there. But if you’re looking for a recommendation I would recommend getting the BumpKase
by NutKase.com I have been using one for a while.
I have written to posts regarding this product ad I will put the link below.
Keep your notes secure with password-protection
Apple, Apple ID, CarriersUpgrading to the iPhone, iOS, iOS 10, iPad Air, iPhon, iPhone, iPhone 6, ipod, iPod touch, notesYou can secure the notes that contain your most personal data—such as financial details, medical info, or website logins—with a password or fingerprint.
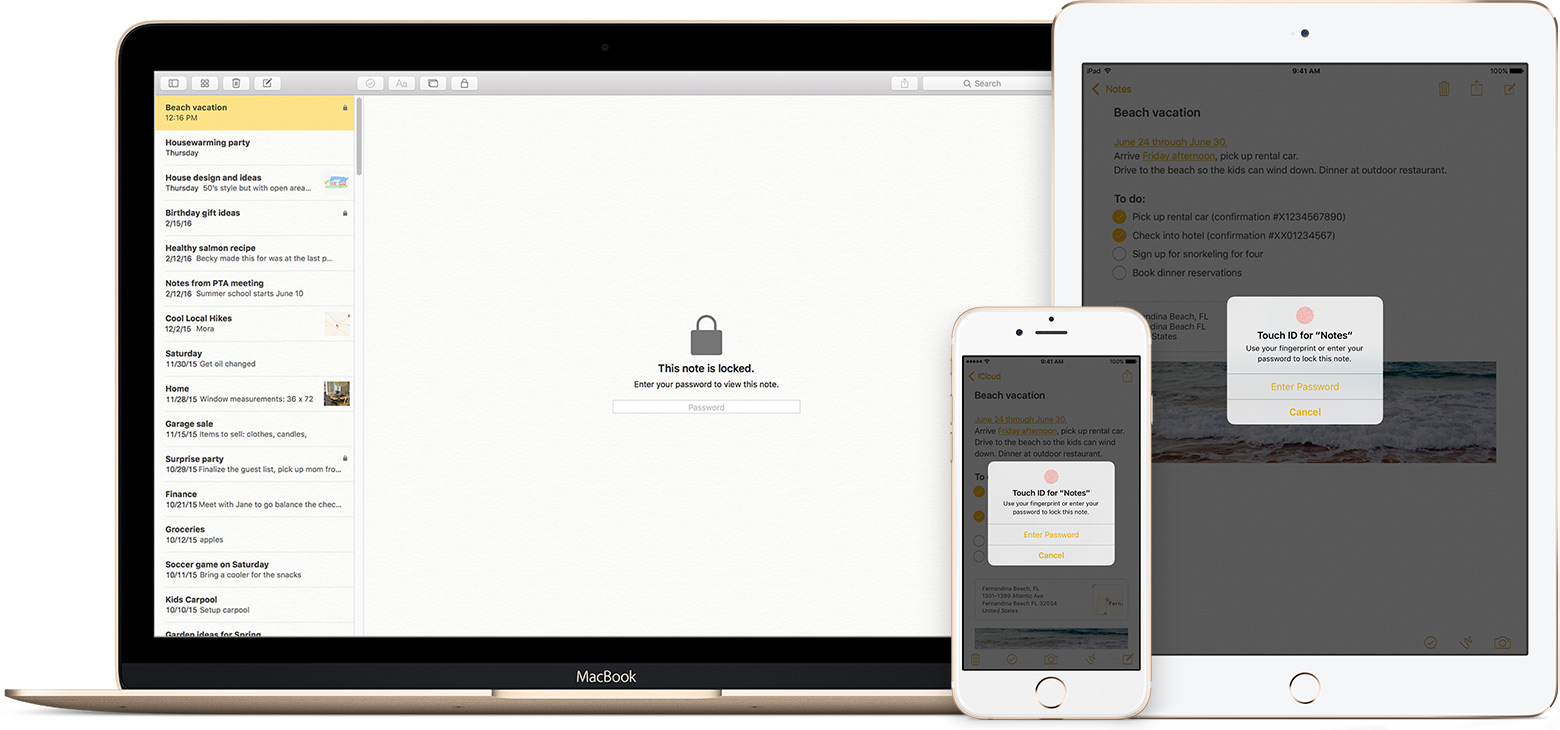
The Notes app lets you lock any note that you want to keep private from anyone else that might use your device. Notes uses a single password for all of the notes that you want to protect, on all of your devices. And if you have an iPhone or iPad with Touch ID, you can use your fingerprint to open your locked notes.
Before you begin
- Update your iPhone, iPad, or iPod touch to iOS 9.3 or later, and your Mac to OS X 10.11.4 or later.
- Make sure that you upgrade your notes.

Set up your notes password
Before you can lock your notes, create a password that you can easily remember. If you’re concerned about forgetting your password, make sure that you give yourself a password hint and that you set up Touch ID. If you forget your password, Apple can’t help you reset it.
If you access your iCloud notes on more than one Apple device, you’ll use the same notes password to lock and unlock all of them.
On your iPhone, iPad, or iPod touch
You can create a password in your device Settings or directly in the Notes app. Then you can turn on Use Touch ID on your iPhone or iPad, so that you can use your fingerprint to unlock your protected notes.
Create a password in Settings
- Go to Settings > Notes.
- Tap Password.
- Enter a password, then give yourself a password hint.
- Tap Done.
Create a password in Notes
- Open a note that you want to lock.
- Tap
 > Lock Note.
 - Enter a password, then give yourself a password hint.
- Tap Done.
On your Mac
You can create a password on your Mac directly in the Notes app. In the menu bar, click Notes > Set Password. Enter a password, then give yourself a password hint and click Done.
Use Notes password-protection
Whether your note has an image, sketch, map, URL, or list of important information, it’s simple to keep it safe with password-protection. And when you need to access your secure notes, you can tell which ones are locked directly from the Notes list. Just look for the  next to the note. Until you enter your password or use Touch ID, you only see the title and the last date that it was edited.
You can’t password-protect notes that you share with someone else. If you want to stop sharing a note, open  , then tap or click Stop Sharing.
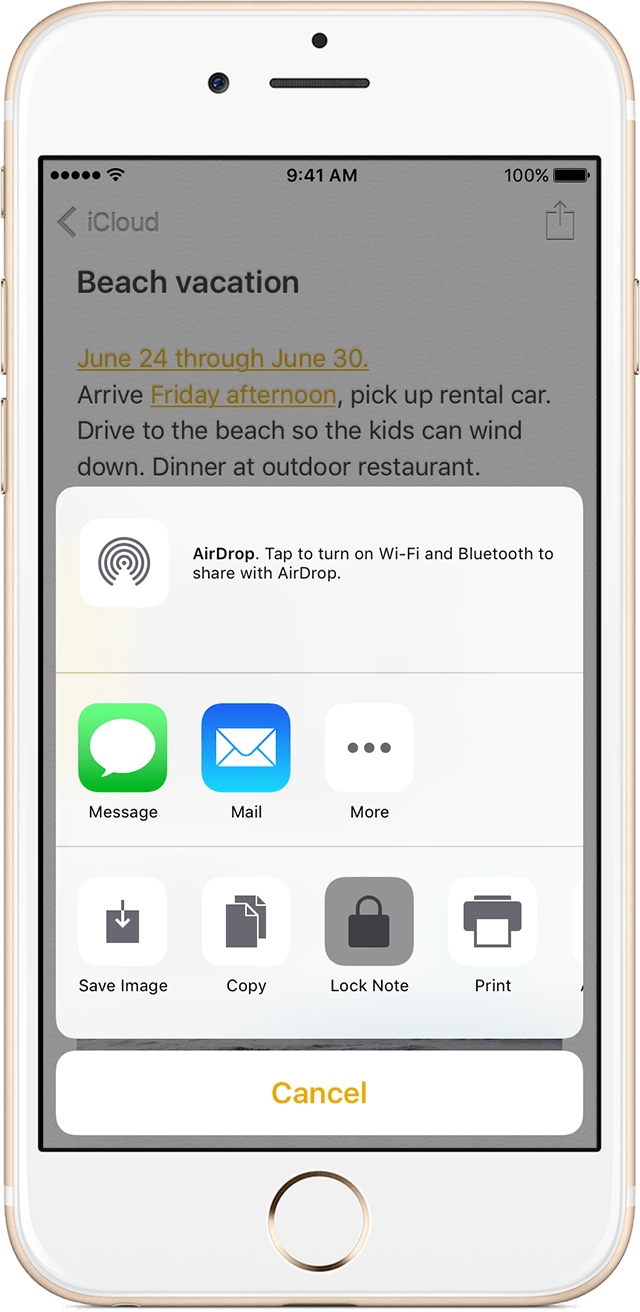
Lock a note
On your iPhone, iPad, or iPod touch:
- Open the note that you want to lock.
- Tap .
- Choose Lock Note.
After you lock your note, it stays open and you’ll see  at the top of the screen. You can hide the note’s contents when you tap .
On your Mac:
- Open the note that you want to lock.
- Click
 .
. - Choose Lock Note.
You can only lock notes on your device and notes in iCloud. You can’t lock notes that have PDFs, audio, video, Keynote, Pages, Numbers documents, or notes that use IMAP to sync (like Yahoo!, Gmail, and Hotmail).
Open a locked note
On your iPhone, iPad, or iPod touch:
- Tap the locked note.
- Tap View Note.
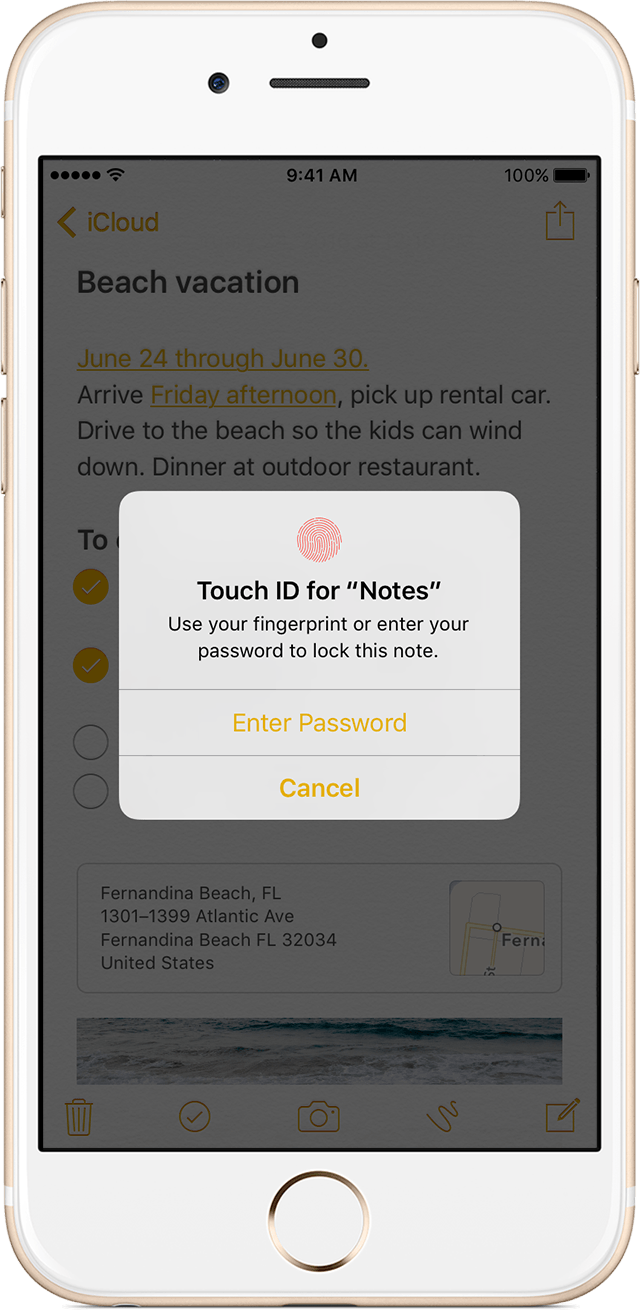
- Enter your password or use Touch ID.
On your Mac and iCloud.com:
- Click the locked note.
- Enter your password.
Your locked notes stay open for up to three minutes, making it easy for you to jump to another note, copy and paste information from other apps, and more. If you close the Notes app or your device goes to sleep, the note locks again.

Remove a lock
On your iPhone, iPad, or iPod touch:
- Tap the locked note.
- Enter your password or use Touch ID.
- Tap .
- Choose Remove Lock.
On your Mac:
- Click the locked note.
- Enter your password.
- Click .
- Choose Remove Lock.
When you remove a lock from a note, it’s removed on all of the devices that you’re signed in to with the same Apple ID.
Change your password
On your iPhone, iPad, or iPod touch:
- Go to Settings > Notes > Password.
- Tap Change Password.
- Enter your old password, then enter a new password and password hint.
On your Mac:
- Open Notes.
- In the menu bar, choose Notes > Change Password.
- Enter your old password, then enter a new password and password hint.
- Click Change Password.
If you forgot your notes password
You can unlock a note only when you enter the password that it’s locked with. If you forgot your password, Apple can’t help you regain access to your locked notes.
You can reset your password, but this won’t give you access to your old notes. It will, however, let you password protect any notes that you create from that point forward with the new password. This could lead to you having multiple notes with different passwords.
If you have multiple passwords, you can’t tell which password you should use when you look at your notes in the Notes list. When you open a note locked by your old password but enter your current password, you’ll see an alert that you entered the wrong password with a hint for your old one. If you then enter the correct old password, you get the option to update that note’s password to your current one.
Reset your notes password
When you reset your Notes password, it doesn’t delete or change the password of your notes that are already locked. If you have a note that uses an old password, you can update it to the new password when you enter the old password, remove the old password, then apply your new password to the note.
On your iPhone, iPad, or iPod touch:
- Go to Settings > Notes > Password.
- Tap Reset Notes Password.
- Enter your Apple ID password.
- Tap Reset Notes Password again.
- Enter your new password and password hint.
On your Mac:
- Open Notes.
- In the menu bar, click Notes > Reset Password > OK.
- Enter your Apple ID password.
- Click Reset Password.
- Enter your new password and password hint.
How to change your Mac computer’s name
Apple, Apple ID, Apple Store, Apple Vis, I Clod, macHow to change the name of your Mac
Step 1: In the Menu bar, go to > System Preferences…
Step 2: Click on Sharing.

Step 3: In the Computer Name box, type in the name you want to use for your computer.

Step 4: Close the window, and you’re done.
As always, feel free to ask if you have any question.
