About BlindSquare

Accessibility, Apple, Apple Store, Apps, Blind, blind people, iPad, iPad Air, IPAD AIR 2, iPad mini, iPad mini 4, iPhon, iPhone, iPhone 6, iPod touch

BlindSquare is a solution that makes use of the latest features available in smartphones to aid the blind and visually impaired in their daily lives. It has been developed and tested in close cooperation with blind and visually impaired users. BlindSquare is available for iPhone and iPad in the App Store.Using your iOS-device’s GPS capabilities, BlindSquare determines your location and looks up information about your surrounding on Foursquare and Open Street Map. It then ascertains the information most useful to you and speaks it in a clear, synthetic voice. It can inform you about shops, restaurants, public buildings, and parks in your vicinity. It will also tell you when you approach a street intersection. You can use it to determine the address of your current location, find places of interest near you, get alerted when you reach places, and save your own places in BlindSquare. You can also use BlindSquare in conjunction with other navigation apps such as Navigon, TomTom, the free Google Maps, and the iOS maps app installed on each iOS-device. These third-party apps can provide spoken turn-by-turn directions, while BlindSquare can inform you about your surrounding and upcoming street intersections.

BlindSquare can go a long way towards helping you to travel more independently, but it will never substitute good orientation and traveling skills. GPS-readings can be unreliable depending on the quality of your GPS-reception. Be sure to use your best judgment when deciding if BlindSquare’s information is correct in a given situation.

BlindSquare is $39.99 in the App Store.  

http://www.blindsquare.com

iOS 8 Accessibility Roundup: More Accessible Than Ever

Accessibility, Apple, Apps, Blind, iOS, iPad, iPad Air, IPAD AIR 2, iPad mini, iPad mini 4, iPhone, iPhone 6, iphone6, ipod, mac, Uncategorized
iOS 8 builds on existing accessibility features to offer some exciting new possibilities for iOS users with disabilities. Many websites will have general information about iOS 8, but this post will focus on accessibility related changes to iOS. iOS 8 includes new keyboard options, improved text-to-speechvoices, improved Guided Access features, and improved Siri functionality among other accessibility related features. Apple can always add or alter features before the general release. The new operating system will be available this fall for the general public.

QuickType and Keyboard

Apple’s iOS 8 will include a built in predictive keyboard called QuickType. This new software keyboard will predict words for the user as they type. Once the word you want to enter appears in the suggestion bar above the keyboard, you simply tap it to insert that word. This feature will cut down on key strokes needed to enter words which will benefit people with dexterity challenges. QuickType even takes context into account so if your typing an email it will suggest more formal language that if you are writing a text message. QuickType will be similar to the Co:Writer app, but will work across all apps on your devices.

In addition to Apple’s own QuickType keyboard, iOS 8 will allow third-party developers to develop keyboards for system wide use. For example, Fleksy could be updated to work with every app on the iPhone or iPad. This flexibility gives users with different abilities the opportunity to switch keyboards to one that fits their needs. For users who are blind or visually impaired downloading the fast and accessible Fleksy keyboard may allow them to more easily enter text.

Health

iOS 8 takes big steps to help people manage data associated with their health. Users can input data into the health app through third-party health monitoring devices like a blood pressure reader or through apps. This data can then be automatically shared with doctors and other health care professionals to help insure timely and appropriate care. For instance, if a blood pressure or glucose reading was outside of a normal range, a doctor could be automatically alerted. This could help people with chronic conditions live more independently especially in their later years.
The health app will include another life saving feature called “in case of emergency card.” This information card will be accessible from the lock screen and will allow first responders and emergency room doctors important health information in the case of an emergency. The card can include a photo, medical conditions, allergies, current medications, and more all to give life saving information to emergency medical personnel.


Family Sharing

Family sharing will allow families with multiple iOS 8 devices to manage their iOS devices more harmoniously. Parents will be able to set up home sharing to monitor their child’s physical location or to share purchased content from the iTunes store among members of the family. Children will also have to ask parents permission before purchasing an app.

Spotlight Search

Spotlight search is an existing feature in iOS 7, but in iOS 8 it gets supercharged. Spotlight in iOS 8 will give Siri-like answers. Unlike Siri, which uses voice input, spotlight uses text input. This new form of input gives users with speech impairments the ability to type, instead of speak, queries and get meaningful results.

Touch ID

iOS 8 improves Touch ID by allowing third-party apps to unlock information using just a user’s fingerprint. Touch ID is currently used for unlocking your device and making iTunes purchases. This feature already is great for blind users because it offers secure authentication without having to type, which can be a slower process with VoiceOver. In iOS 8, the ability to access third-party apps with just a finger print will expand on the already very accessible Touch ID feature of iOS 7.

Siri
iOS 8 will also bring improvements to Siri. Most notably, users will be able to activate Siri hands-free by saying “Hey, Siri.” This new hands-free voice command may benefit people that have trouble activating the home button. This always listening feature is similar to Google’s advanced voice search.

iOS 8 will also offer faster dictation that appears on screen as you speak. This new feature will prusumably work with Siri and in app dictation.

Much More
Credit: Apple

iOS 8 will also include features that Apple did not have time to fully preview during their keynote. The first one included in the keynote was “Braille Keyboard for direct 6-dot Braille input.” Other accessibility related features include the ability to use the advanced and high quality Alex voice. The Alex voice is currently available for the Mac and many users enjoy its high quality. iOS 8 will also include improved zoom for accessibility, but no further details on this feature where offered.

iOS 8 will also include some enhancements to Guided Access. Guided Access is a feature that locks a user into a single app. This is great for teachers administering tests on an iPad or parents of kids who are easily distracted. In iOS 8, users will be able to use Touch ID to exit from Guided Access. Users will also be able to use time limits and countdown timers to control Guided Access.

Another feature listed is “Speak screen,” a somewhat mysterious feature than did not garner any further explanation from Apple. Speak screen may be a brand new accessibility feature or maybe unrelated to accessibility, but the name seems to imply some link to accessibility.

How do I clean my AirPods?

airpads, Apple, Apple ID, blind people, iOS 10, IOS 8, iOS 9, iPad, IPAD AIR 2, iPad case, iPad mini, iPhon, iPhone 4s, iPhone 6, iPhone battery

Protect your investment with regular cleanings and good aural hygiene. Dropping $160 on a pair of wireless earbuds in a dental-floss-sized case is no small decision. If you decided to spring for a pair of AirPods, you’re going to want to take good care of them so they’ll last you a couple rounds of iPhone upgrades. After all, these ones don’t come bundled in the box. Here’s how you clean your AirPods and keep ’em clean! With dirt, dust, lint, grime, ear wax, and more constantly finding its way onto your glossy white AirPods, you’re definitely gonna want to clean them from time to time. Consistency is your friend, friend: The best way to ward off long-lasting grime is by preventing it from building up. Clean and clean regularly.

Carry a microfiber cloth

Get a little microfiber cloth and keep it on your person or store it wherever you charge your AirPods. Give your AirPods (and the case if you want) a quick buff every couple days.
If you happen to spot an offending smudge, go ahead and wipe it away.
You can pick up a six pack of microfiber cleaning cloths from Amazon and be set for life … or at least the life of your AirPods! Do not use hand sanitizer on your AirPods. You risk damaging the polish — or worse, the electronics. Instead, a little bit of water (purified is better than tap) on a cloth can help you wipe away the grease and grime.

As much as I wish Apple’s AirPods were a seamless piece of plastic, they’re not. And the tiny, tiny little cracks and crevices start to fill up with dust, grime, etc. When a cloth-polish just won’t do, you’ve gotta get up close and personal.
I find a cotton swab is great for a thorough cleaning of your AirPods. Whether you’ve got ear wax clinging to the speaker grilles or dirt in the seams, a cotton swab will usually do the trick.
Lastly, if you’ve got a particularly stubborn smudge that won’t wipe away from the surface of your AirPods, you might try giving it a quick swipe or four with a rubber eraser. The rubber will pull the mark from the surface of your AirPods.

A word of warning, though: Don’t get lazy! Check on your little Pod Pals from time to time to make sure they’re not collecting grime.


Keep your notes secure with password-protection

Apple, Apple ID, CarriersUpgrading to the iPhone, iOS, iOS 10, iPad Air, iPhon, iPhone, iPhone 6, ipod, iPod touch, notes

You can secure the notes that contain your most personal data—such as financial details, medical info, or website logins—with a password or fingerprint.

The Notes app lets you lock any note that you want to keep private from anyone else that might use your device. Notes uses a single password for all of the notes that you want to protect, on all of your devices. And if you have an iPhone or iPad with Touch ID, you can use your fingerprint to open your locked notes.

Before you begin

Set up your notes password

Before you can lock your notes, create a password that you can easily remember. If you’re concerned about forgetting your password, make sure that you give yourself a password hint and that you set up Touch ID. If you forget your password, Apple can’t help you reset it.
If you access your iCloud notes on more than one Apple device, you’ll use the same notes password to lock and unlock all of them.

On your iPhone, iPad, or iPod touch

You can create a password in your device Settings or directly in the Notes app. Then you can turn on Use Touch ID on your iPhone or iPad, so that you can use your fingerprint to unlock your protected notes.

Create a password in Settings

  1. Go to Settings > Notes.
  2. Tap Password.
  3. Enter a password, then give yourself a password hint.
  4. Tap Done.

Create a password in Notes

  1. Open a note that you want to lock.
  2. Tap Share icon > Lock Note.
  3. Enter a password, then give yourself a password hint.
  4. Tap Done.

On your Mac

You can create a password on your Mac directly in the Notes app. In the menu bar, click Notes > Set Password. Enter a password, then give yourself a password hint and click Done.

Use Notes password-protection

Whether your note has an image, sketch, map, URL, or list of important information, it’s simple to keep it safe with password-protection. And when you need to access your secure notes, you can tell which ones are locked directly from the Notes list. Just look for the  next to the note. Until you enter your password or use Touch ID, you only see the title and the last date that it was edited.
You can’t password-protect notes that you share with someone else. If you want to stop sharing a note, open , then tap or click Stop Sharing.
     

Lock a note

On your iPhone, iPad, or iPod touch:
  1. Open the note that you want to lock.
  2. Tap Share icon .
  3. Choose Lock Note.
After you lock your note, it stays open and you’ll see unlocked notes icon at the top of the screen. You can hide the note’s contents when you tap .
On your Mac:
  1. Open the note that you want to lock.
  2. Click lock notes icon.
  3. Choose Lock Note.
You can only lock notes on your device and notes in iCloud. You can’t lock notes that have PDFs, audio, video, Keynote, Pages, Numbers documents, or notes that use IMAP to sync (like Yahoo!, Gmail, and Hotmail).
     

Open a locked note

On your iPhone, iPad, or iPod touch:
  1. Tap the locked note.
  2. Tap View Note.
  3. Enter your password or use Touch ID.
On your Mac and iCloud.com:
  1. Click the locked note.
  2. Enter your password.
Your locked notes stay open for up to three minutes, making it easy for you to jump to another note, copy and paste information from other apps, and more. If you close the Notes app or your device goes to sleep, the note locks again.
     

Remove a lock

On your iPhone, iPad, or iPod touch:
  1. Tap the locked note.
  2. Enter your password or use Touch ID.
  3. Tap Share icon.   
  4. Choose Remove Lock.
On your Mac:
  1. Click the locked note.
  2. Enter your password.
  3. Click .   
  4. Choose Remove Lock.
When you remove a lock from a note, it’s removed on all of the devices that you’re signed in to with the same Apple ID.

Change your password

On your iPhone, iPad, or iPod touch:
  1. Go to Settings > Notes > Password.
  2. Tap Change Password.
  3. Enter your old password, then enter a new password and password hint.
On your Mac:
  1. Open Notes.
  2. In the menu bar, choose Notes > Change Password.
  3. Enter your old password, then enter a new password and password hint.
  4. Click Change Password.

If you forgot your notes password

You can unlock a note only when you enter the password that it’s locked with. If you forgot your password, Apple can’t help you regain access to your locked notes.
You can reset your password, but this won’t give you access to your old notes. It will, however, let you password protect any notes that you create from that point forward with the new password. This could lead to you having multiple notes with different passwords.
If you have multiple passwords, you can’t tell which password you should use when you look at your notes in the Notes list. When you open a note locked by your old password but enter your current password, you’ll see an alert that you entered the wrong password with a hint for your old one. If you then enter the correct old password, you get the option to update that note’s password to your current one.

Reset your notes password

When you reset your Notes password, it doesn’t delete or change the password of your notes that are already locked. If you have a note that uses an old password, you can update it to the new password when you enter the old password, remove the old password, then apply your new password to the note.
On your iPhone, iPad, or iPod touch:
  1. Go to Settings > Notes > Password.
  2. Tap Reset Notes Password.
  3. Enter your Apple ID password.
  4. Tap Reset Notes Password again.
  5. Enter your new password and password hint.
On your Mac:
  1. Open Notes.
  2. In the menu bar, click Notes > Reset Password > OK.
  3. Enter your Apple ID password.
  4. Click Reset Password.
  5. Enter your new password and password hint.

Assistive Technology Blog: Apple’s New Features For People With Disabilities

Apple Store, CarriersUpgrading to the iPhone, Chelsea Stark, iPad, iPhon, iPhone, iPhone 6

Assistive Technology Blog: Apple’s New Features For People With Disabilitiesphoto of a macbook

Just yesterday, Apple announced several new features that will bring in lots of additional functionality and convenience across all products in this coming fall. However, what are some of the features that can be used by people with disabilities?
It seems like a lot of new features will enable people who have visual impairment, impaired motor skills, muscular dystrophies/atrophy, and other similar disabilities to interact with the devices just with their voice and get desired results very quickly and efficiently. Using the new features with an additional eye tracking device for those who need it can definitely enhance their experience as well.
iOS
iOS for iPhone and iPad get the most features in the upcoming release. By just talking to Siri, a user would be order a ride, send money to someone, order food, and do similar activities.
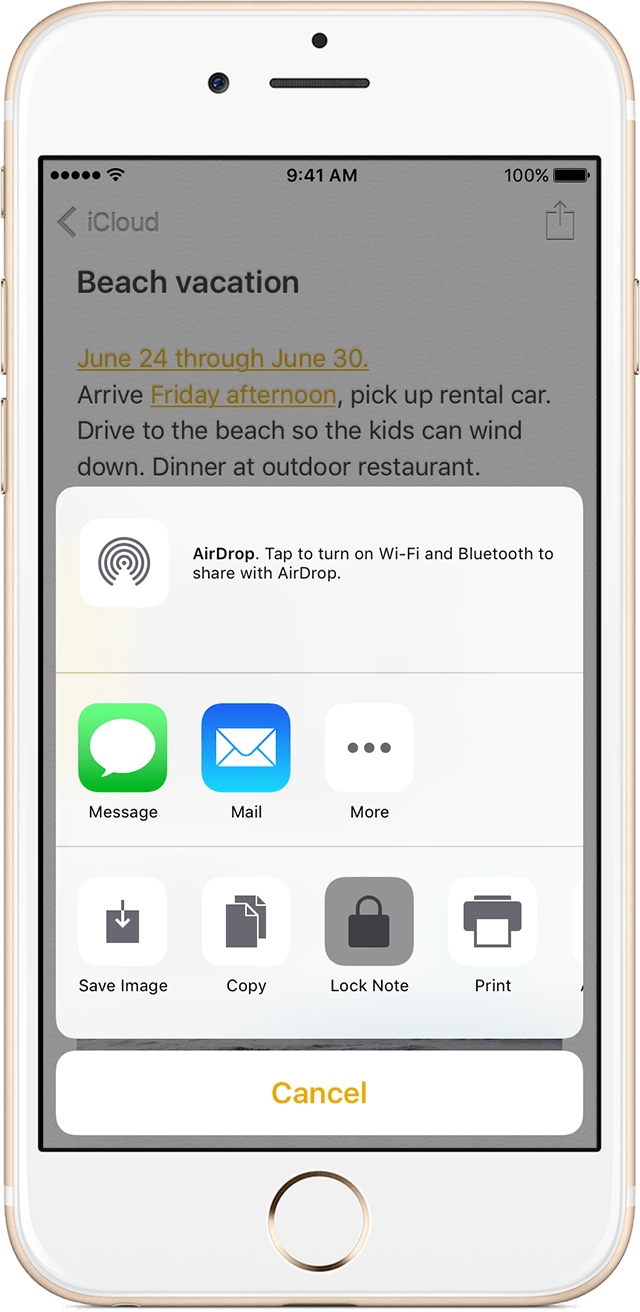
iphoen screen showing image of someone composing an email. It displayes Contextual prediction is being introduced which means that iOS will predict what a person is trying to type by making suggestions in various contexts. For example, if someone is typing “I am available today at”, the free time on their calendar will pop up as an option. Similarly, when typing “John’s phone number is”, John’s phone number will be pulled from the address book and displayed as an option.
Search has been enhanced to use  artificial intelligence. iOS can detect objects in photos, and a user can now search for just the photos that were taken at the beach, for example.
Apple Pay is coming to various shopping websites so no need to type in a credit card number and other information every time a user goes to a shopping website. Purchases can now be made with just a click of a button in a secure manner.
WatchOS
In the upcoming release, apps will load much faster. A user would also be able to add minutes to a parking meter, order their food, and make other similar purchases using Apple Pay on their watch. 
The fitness aspect of the watch has included a wider audience now – wheelchair users! Wheelchair users will be able to track their physical activity through various pushing techniques for various speeds and terrains. Wheelchair specific workouts have now been included, and notifications will be sent every hour for “time to roll” when a person has been sitting and not moving for a long time, to encourage them to be active.
Pressing the side button initiates a call with local emergency services anywhere in the world. It can also be used to send a quick text to a user’s emergency contacts.
Wearing an Apple Watch will also work as an authentication mechanism for a user’s Mac. When a user wearing an Apple Watch approaches their Mac, the Mac senses their presence and logs them in automatically. No need to type the password for  unlocking the computer.
The new “Home” app will also let users control connected (Internet of Things) devices around the house using their phone, tablet, watch or TV. Location based automation can also be set up using the Home app – if a user is approaching the house, turn on the lights, pull up the blinds, and set the thermostat to 68 degrees.

MacOS (formerly OS X)
Siri is now coming to Mac. Siri can locate files for a user (“Show the pdfs in my Downloads folder”, “Show my photos from yesterday”), add and modify events (“Add Laura to my 10 AM meeting”), search for images from the internet (“Show me images of Lake Tahoe”), play music, check weather, and do lots of other things.

These are some of the features that people with disabilities can use that will make things easier for them. We should hopefully see a full list of accessibility features from Apple in the near future.

Source: Apple

Image Sources: Appleacross all pro…

How to Turn Off the Passcode Screen in iOS 7

Accessibility, airpads, Apple, Apple ID, Apps, Blind, blind people, Color ID, I Clod, iCloud, iOS, iPad Air, IPAD AIR 2, iPad mini, iPad mini 4, iPad Pro 9 inch, iPhone, iPhone 6, iphone6, iPod touch, Low vision, Uncategorized

Passcode Lock ScreenWhen you upgraded your iPhone or iPad to iOS 7, you were asked to enter a passcode during the setup process. Then, when the setup was complete, your device now requires this code to be entered every time you use it.

Having a passcode on your device does provide some added security that will keep someone from using your device without your permission. Additionally, if your device is lost or stolen, someone can not access the Settings on your device to disable the Find My iPhone features that allow you to locate the device and remotely wipe the data on the device.

However, there are instances where someone may not want to have this level of security on their device. If you installed iOS 7 and now have to enter a code to use your device, it can easily be removed.

Disable the Passcode

Open the Settings app and select Passcode.

iPhone Passcode Setting


You will be asked to enter your code.

Enter Passcode


After entering your code, you will see the Turn Passcode Off option at the top of the window. Select this option and you will again be asked to enter your code.

Passcode Off


After entering the code this one last time, the passcode function will now be disabled for the device. You will know the function has been disabled because the screen will now display the Turn Passcode On option. The next time the device goes to sleep mode, it can be awakened and used without entering a code.

Passcode On


Keep the Passcode But Lessen the Pain

If you like the added security of a passcode, but don’t like entering it every time you use the device, try changing the frequency in which a code is required. With the passcode function enabled, tap on Require Passcode. Here you will have the option of selecting when a code is required after a certain period of inactivity. Shorter times provide a higher level of security than longer times.

Passcode Time

What If I Haven’t Installed iOS 7 Yet?

If you haven’t installed iOS 7 yet and wish to avoid setting a code on your device, there is an option to skip the passcode during the setup process. It is easy to overlook, so pay close attention when asked to enter a code.

Skip Passcode


If you need additional information or there is something else you would like to see on iAnswerGuy, please send me a question and I will try to answer it in a future article.